Writing by GUI
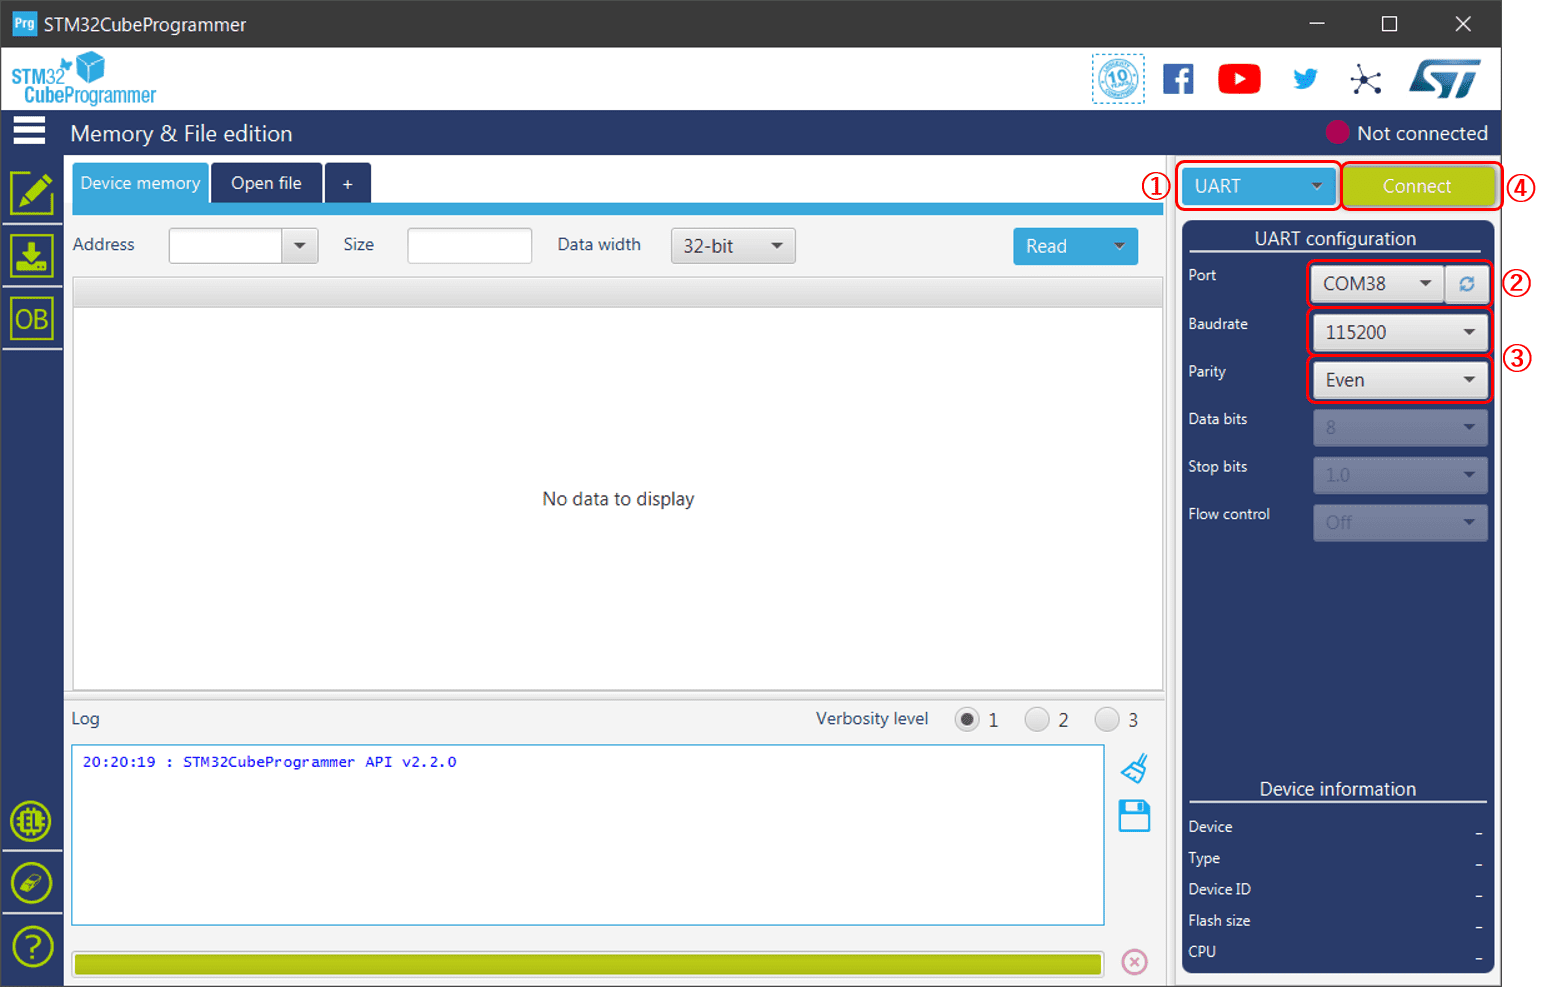
- Launch STM32CubeProg and connect it to the microcontroller of the product
- Select “UART” from the Interface field in the upper right corner.
- Select the appropriate COM port.
- Select 115200 for “Baudrate” and Even for “Parity”.
- Press the “Connect” button.
The product is recognized and “Connected” is displayed in the upper right corner.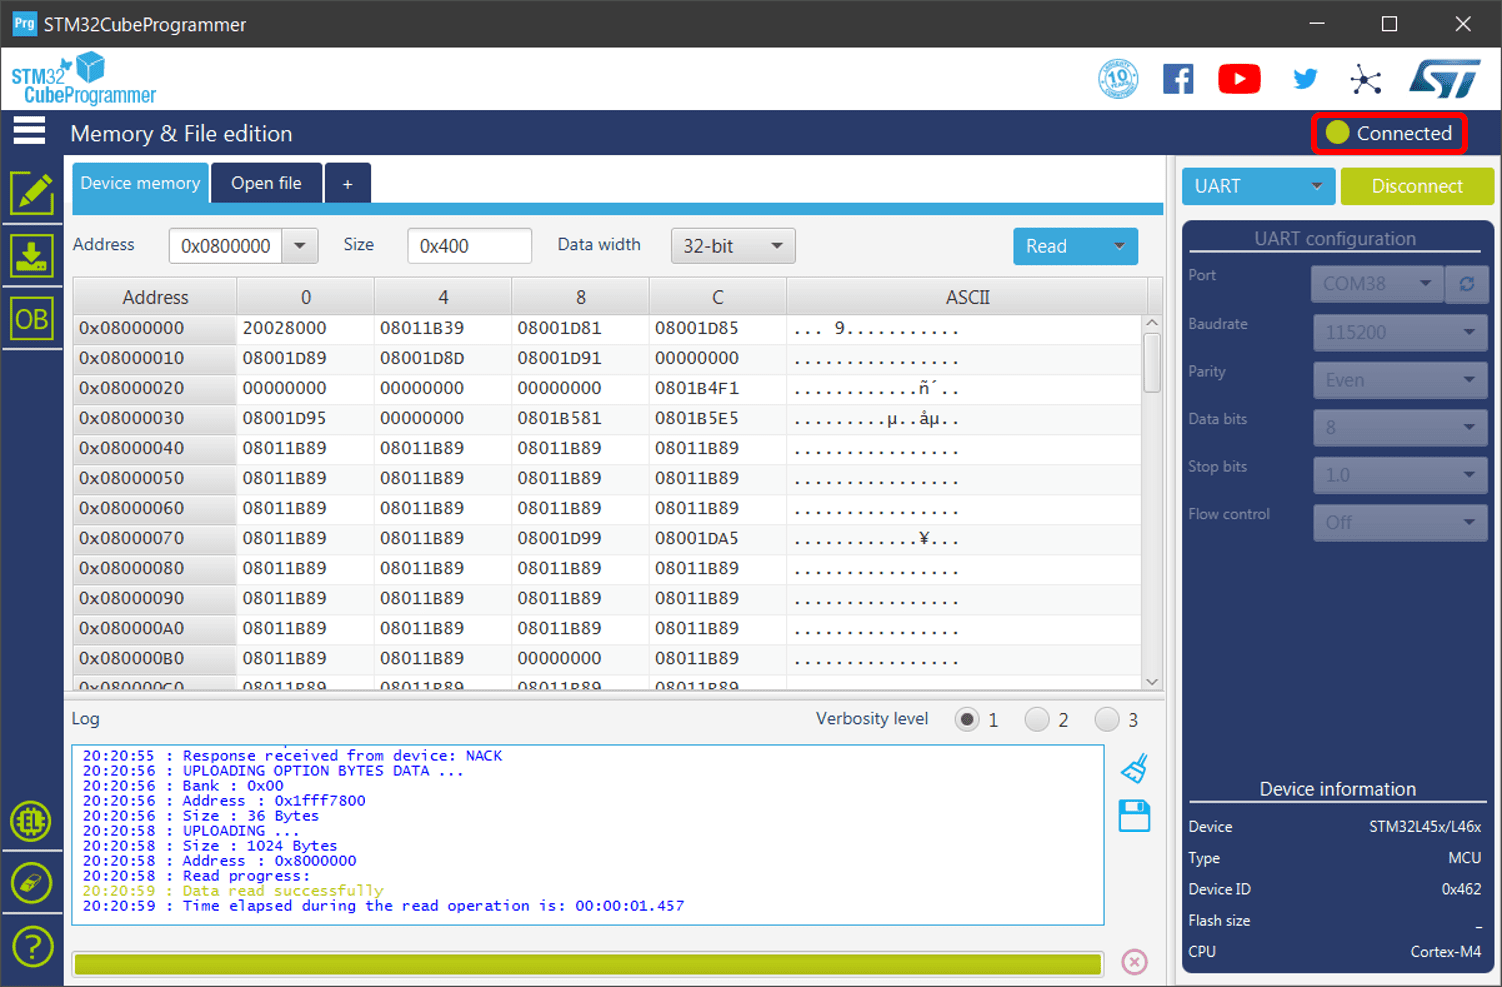
- Erase the firmware
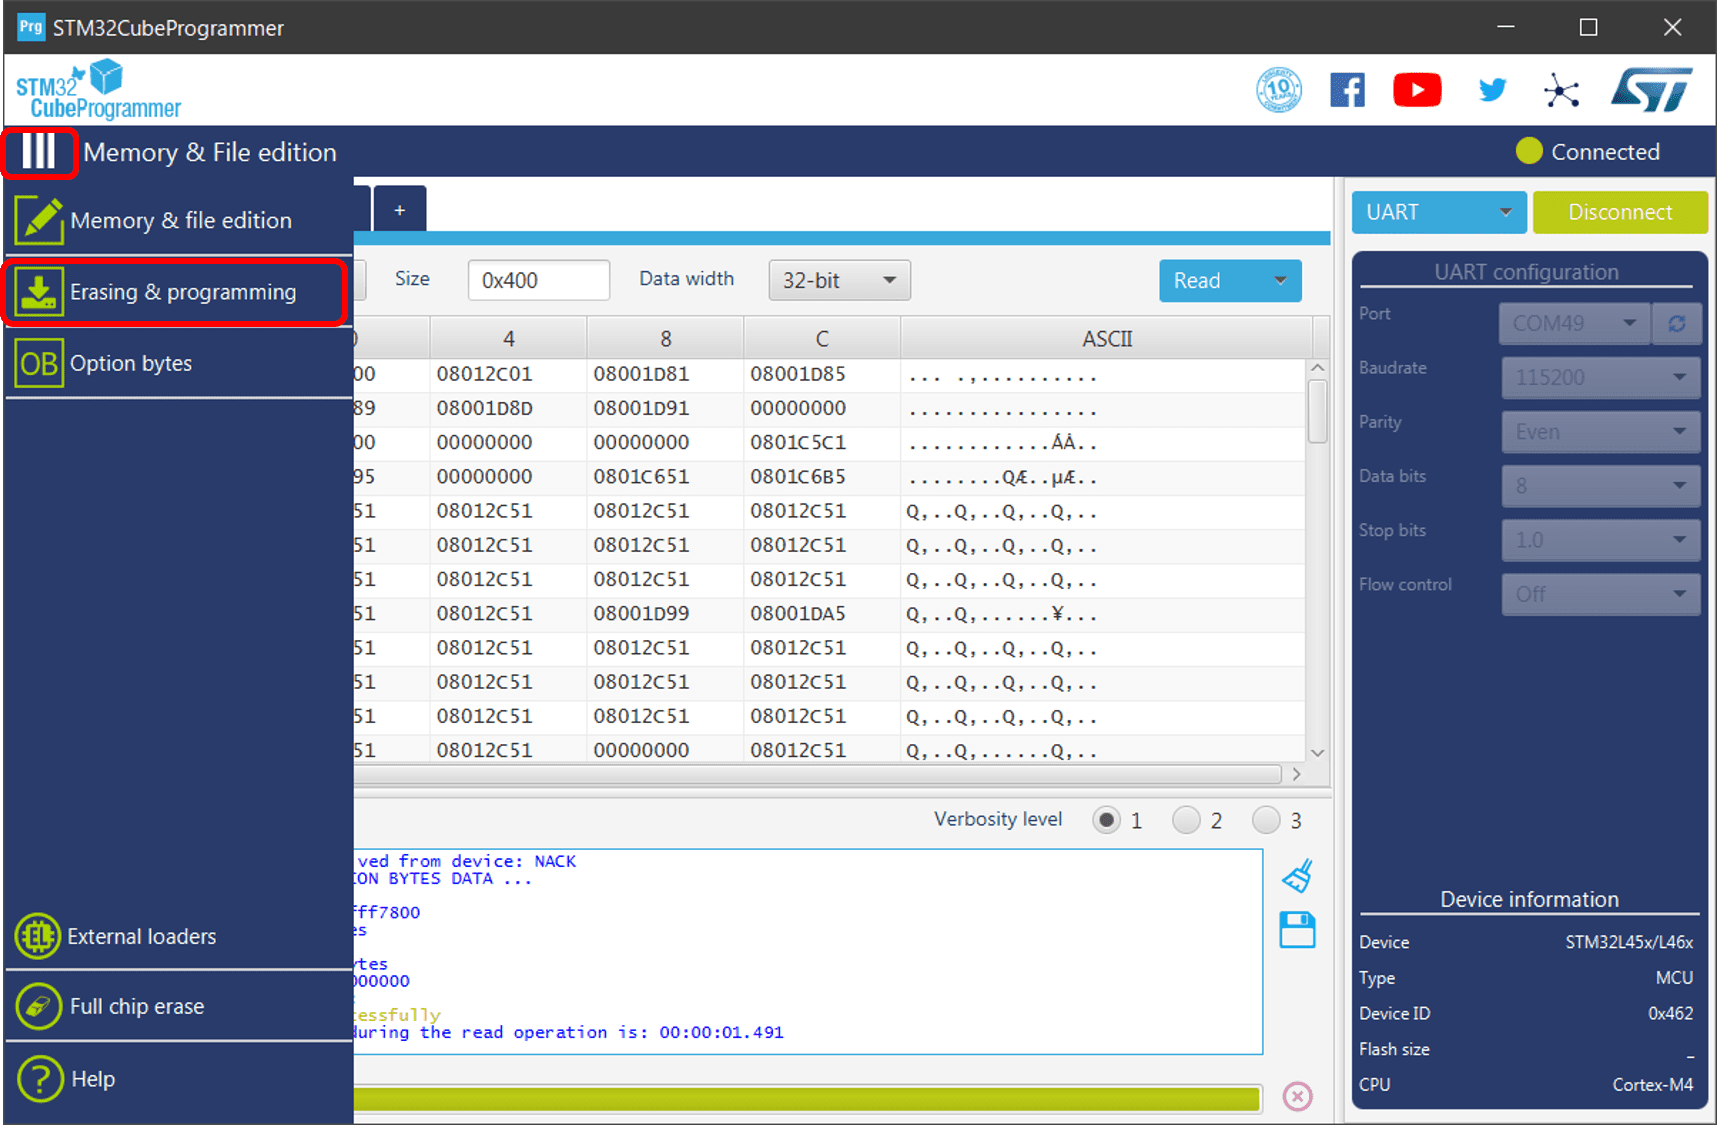
- Open the top left menu bar and select “Erasing & programming”.
- Press the “Full chip erase” button on the “Erase flash memory” tab.
Press “OK” when the confirmation screen appears.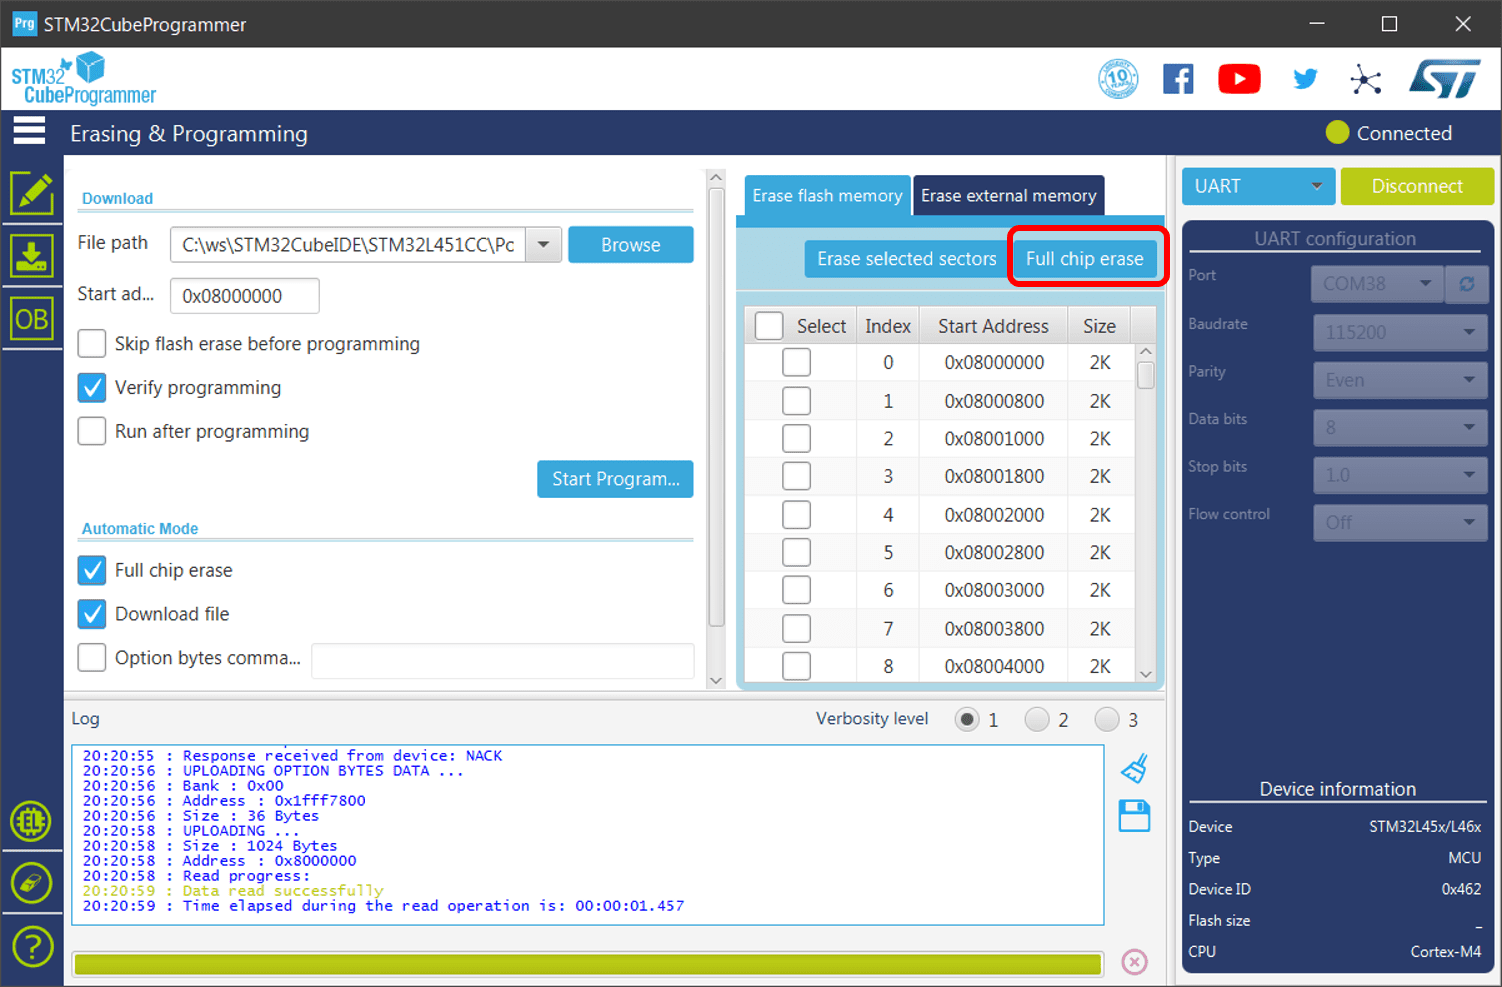
- Open the top left menu bar and select “Erasing & programming”.
- Writing firmware to the product
- Press the “Browse” button and select the downloaded firmware (extension: .bin).
- Make sure “Verify programming” is checked (if not, check it).
- “Start Program…” button to start writing the firmware.
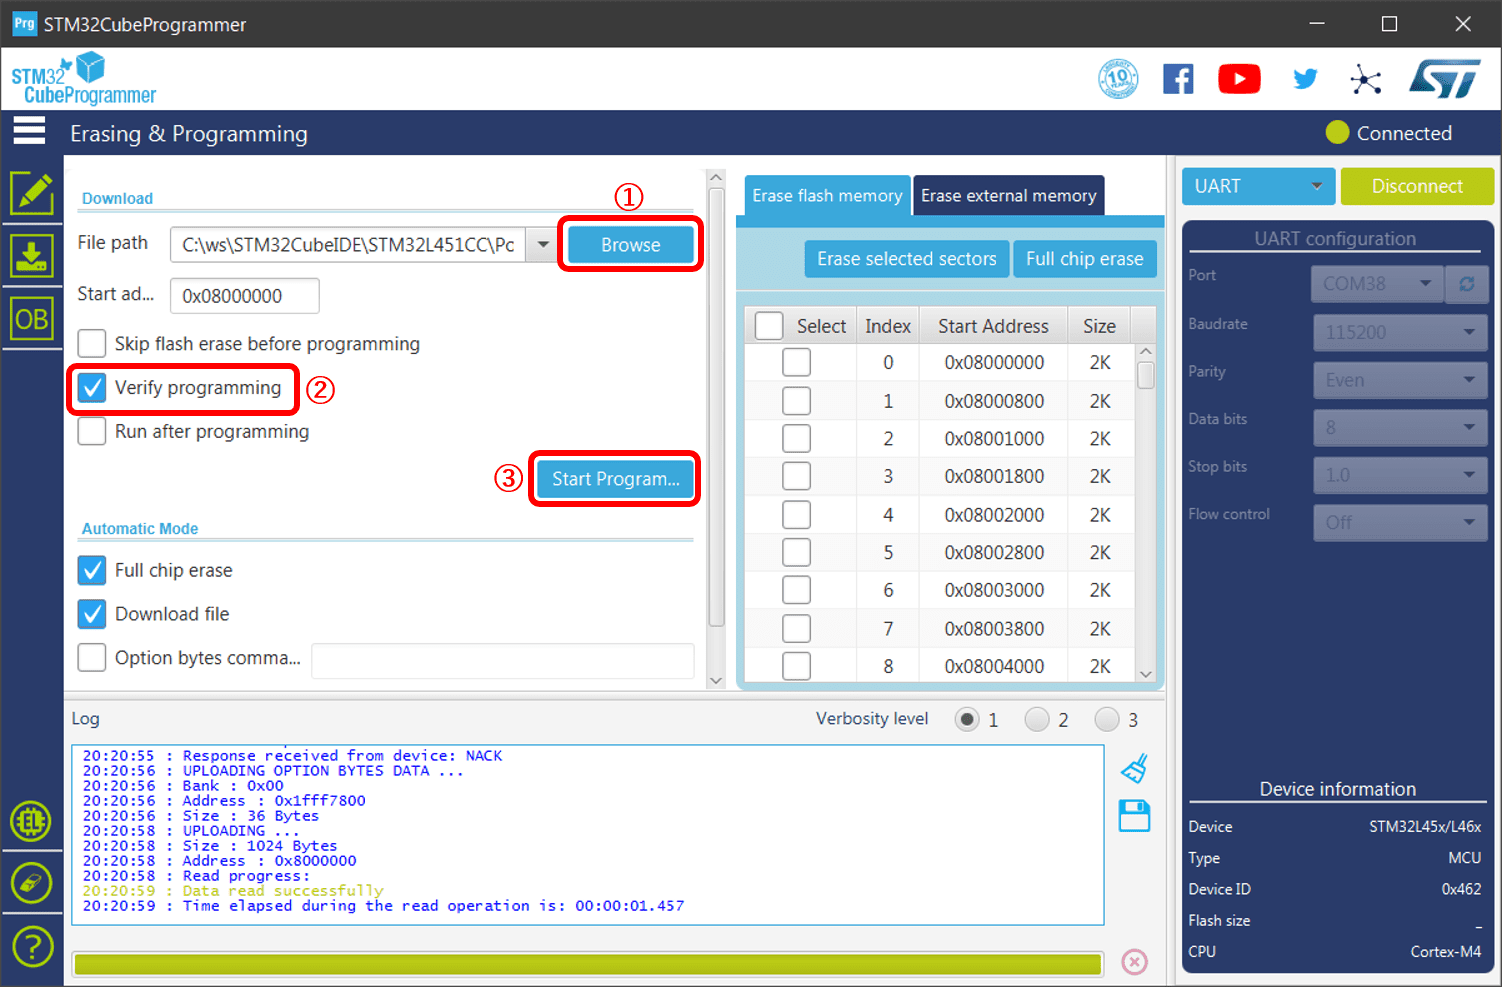
- After writing and verifying (this may take a minute or so, depending on the environment), a message window will appear saying “File download complete” and “Download verified successfully”, then press “OK”.
- Disconnect the microcontroller
- Press the “Disconnect” button in the upper right corner.
Writing by CUI
The following commands can be executed as root to write in the same way as the above GUI writing.
Please rewrite the firmware writing software STM32_Programmer.sh(Linux) / STM32_Programmer_CLI.exe(Windows), the directory of the firmware XXX.bin, and the USB port number according to your environment.
Example for Linux
/usr/local/STMicroelectronics/STM32Cube/STM32CubeProgrammer/bin/STM32_Programmer.sh --connect port=/dev/ttyUSB0 br=115200 --erase all --write /home/USERNAME/mc-uep100_v1-0-0.bin 0x08000000 --verify
Example for Windows
"C:\Program Files\STMicroelectronics\STM32Cube\STM32CubeProgrammer\bin\STM32_Programmer_CLI.exe" --connect port=COM2 br=115200 --erase all --write "C:\FIRM_PATH\encoder-counter_1-0-0.bin" 0x08000000 --verify